How to Install WordPress on localhost XAMPP
Our belief is that one of the factors contributing to WordPress' enormous market share is its user-friendly learning curve. The likelihood is that you will have a WordPress-powered website up and operating within hours, whether you are a complete novice or an experienced developer.
The ability to set up your development environment wherever you wish and concentrate only on building WordPress hooks rather than tinkering with environment variables is one of the best things about WordPress development. You have a variety of alternatives in this regard, from installing it locally to using a fully managed cloud server.
In this piece, I'll go over how to install WordPress locally and set up a development environment that works for you whether you're creating your very first WordPress website or you just need to whip up a quick demo for a customer.
How can install WordPress locally?
WordPress may be easily installed on localhost.
It's crucial to keep in mind that WordPress does not run natively on your local computer. For proper operation, it needs a web server, PHP, and a database (MySQL is a popular option). These elements work together to form the setting in which WordPress runs.
Usually, the following steps are involved in creating a WordPress environment:
Set up the surroundings
Get a fresh copy of WordPress.
Install WordPress on the localhost
Windows WordPress installation
The installation of WordPress on the Windows operating system is covered in this section. The procedure for setting up and configuring a virtual host on Windows 10 with XAMPP is shown in the steps that follow.
Step 1: Install WordPress and XAMPP
It's crucial to create the ideal atmosphere for WordPress before downloading. Installing XAMPP or WAMP on Windows will enable you to build up a server-database stack (the industry favorites are Apache as a web server and MySQL as the database).
We'll be using XAMPP in this tutorial, which you can obtain from the Apache website.

You will notice a variety of settings that are compatible with various PHP versions. I chose the options that are most compatible with the most recent PHP release.
Run it after the download is complete to install XAMPP on your local computer. Launch the control panel after installation to see and modify Apache and MySQL statuses.

Installing WordPress locally requires starting these two services.
Step 2: Locally install and configure WordPress
Download the WordPress setup from the official website after configuring the webserver and database.

Place the zip file in the XAMPP directory's /htdocs folder. Navigate to the project directory after unzipping the file.
Important: Ensure that the Apache and MySQL services are active in the XAMPP management panel.
Next, build the database for your new WordPress site by going to the phpMyAdmin portal. The portal is most likely located at the following URL (depending on your port configuration).

Launch the WordPress installation configuration by going to the following URL once the database has been built.
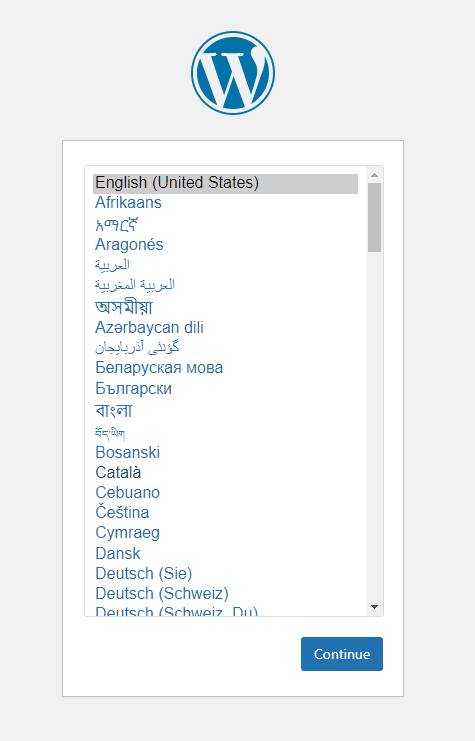
Choose the preferred language, then click "Continue."
Follow the instructions to add database credentials to the wp-config.php file on the next screen.

Your preferred code editor should open the wp-config.php file where you can define the database credentials as follows:

Return to the WordPress installation procedure after saving the file.
Type in the username, password, and database name. You are free to create your own table prefix, but for now I'm sticking with the default. Once finished, press "Submit."
The successful database setting will be verified on the next screen. To start installing WordPress, click "Run the installation."

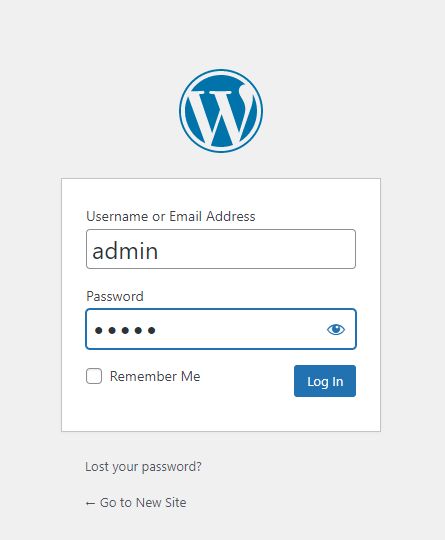
Give details about your website on the following screen, then enter your account and password to access the WordPress dashboard.

Click the "Install WordPress" button when you're finished. The success message and button to open the well-known WordPress dashboard login page will be displayed.

That is all that is required to locally install WordPress on a Windows computer.